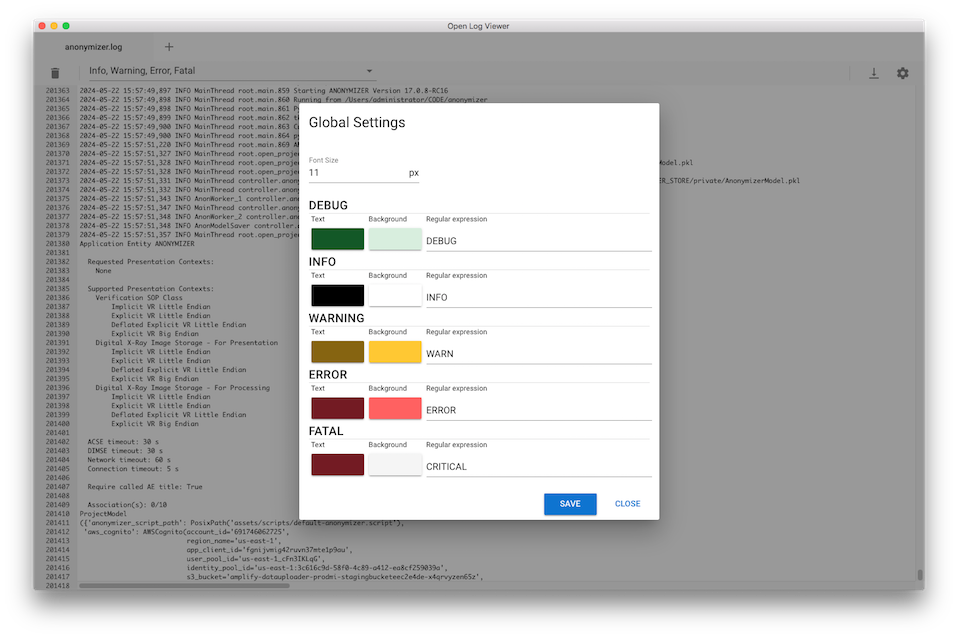
Project Settings
- The setting names are listed in the left column and the corresponding values or options are in the right column.
- Most settings can be configured by clicking the corresponding blue button.
- Each setting is described below:
Site ID
- The Site ID is either auto-generated or parsed from a Java Anonymizer Index File (Index.xlsx).
- The Site ID cannot be changed after project creation.
- The Site ID is written as the first entry in the private block (0013,1001) of every anonymized DICOM file.
- The Site ID appears within square brackets in the title bar of the dashboard, following the project name when a project is open.
Auto-generation
- The Site ID is auto-generated by the Anonymizer when a new project is created.
- To ensure uniqueness, it is time-based and equal to the number of 30 minute intervals since 1 Jan 1970.
Configure project by importing Java Anonymizer Index File (Index.xlsx)
- If the user clicks the Load Java Index File button and imports the contents of a Java Anonymizer index file, the Site ID will be parsed from the first study row read from the index file.
- The data of all studies in the index file will be imported into the Anonymizer database to ensure unique UIDs continue to be generated for the project.
Project Name
- The project name must be less than 16 characters.
- The project name is written as the second entry in the private block (0013,1003) of every anonymized DICOM file.
- The project name is used as the default directory name for the Anonymizer store, see the Storage Directory setting below.
- The project name appears in the title bar of the dashboard of an open project followed by the Site ID in square brackets.
- The project name cannot be changed after project creation.
UID Root
- The UID Root forms the prefix of all DICOM UIDs generated by the Anonymizer for this project.
- By default it is set to the RSNA UID Root.
- The UID Root cannot be changed after project creation.
- The Anonymizer generates sequential UIDs for a project with the format: "[UID Root].[Site ID].[N]" where N is the integer sequence number.
DICOM Servers
Local Server
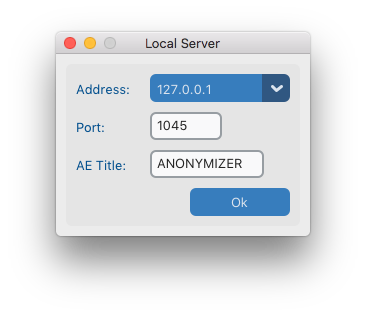
- The local server acts as both the DICOM Service Class Provider (SCP) and the Service Class User (SCU) for the Anonymizer.
- The Address drop down box is populated with the IP addresses of the network interfaces of the local machine.
- When a project is opened, the local SCP is started and listens for incoming DICOM associations on the selected address, specified port and AE Title.
- The local SCP will accept associations from any remote SCU calling the specified AE Title.
- When a project is closed, the local server SCP is stopped.
- The local server SCU is allocated ports from the operating system for outgoing DICOM associations but uses the same address and AE Title as the SCP.
Query Server
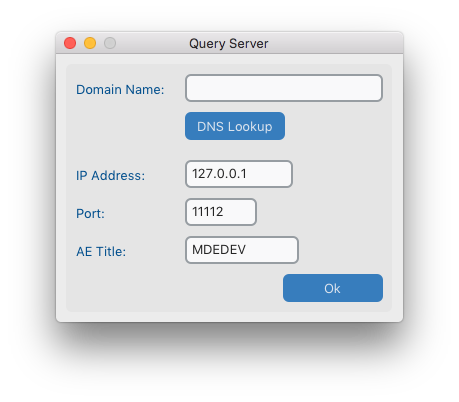
- The query server is the remote DICOM Service Class Provider (SCP) that the Anonymizer will query and retrieve DICOM files from.
- If necessary and supported by the network architecture, the query server address can be found using its domain name through a DNS lookup.
- The query server address, port and AE Title specifies how the query SCP listens for incoming DICOM associations.
- The Anonymizer's local SCU details will typically need to be added to the remote server's allowed DICOM SCU's tables to allow access.
- The query server must be configured to allow the Anonymizer SCU to perform C-ECHO, C-FIND and C-MOVE requests.
- The query server must be configured with the Anonymizer SCP destination details (address, port, AE Title).
- The Anonymizer local SCU retrieves DICOM studies and their associated files from the query server by issuing DICOM C-MOVE requests at a user specified level.
- The Anonymizer local SCP receives the files from the query server on a separate association from which the request was made (as per the C-MOVE protocol).
- The details of the query and import process can be found in the Query, Retrieve & Import View section below.
Export Server
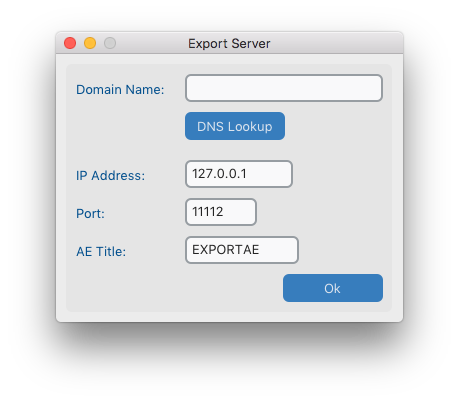
- The export server is the remote DICOM Service Class Provider (SCP) that the Anonymizer will send DICOM files to.
- If necessary and supported by the network architecture, the export server address can be found using its domain name through a DNS lookup.
- The export server address, port and AE Title specifies how the export SCP listens for incoming DICOM associations.
- The Anonymizer's Local SCU details will typically need to be added to the remote export server's allowed DICOM SCU's tables to allow access.
- The export server must be configured to allow the Anonymizer SCU to perform C-ECHO, C-FIND and C-SEND requests.
- The Anonymizer SCU sends DICOM studies and their associated files to the export server by issuing DICOM C-SEND requests at a user specified level.
- The details of the export process can be found in the Export View section below.
AWS S3 Server
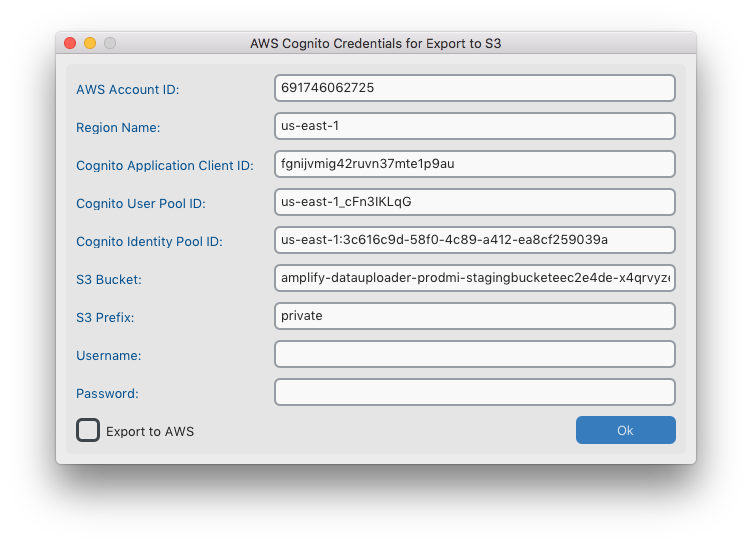
- The AWS Cognito Credentials dialog captures the parameters required for the Anonymizer to send anonymized studies to an AWS S3 storage bucket as an AWS Cognito application user.
- The default values, except for Username and Password are the values required to send to the RSNA Imaging Archive.
- Contact RSNA Informatics department for registering your Site ID & Project to receive a Username and Password for exporting to their archive.
- To configure a custom AWS S3 installation requires the setup of a Cognito application, user and identity pool with ListBucket and PutObject permissions.
- The Export to AWS checkbox must be checked to enable AWS S3 Export instead of the DICOM Export Server.
- The details of the export process to AWS S3 can be found in the Export View section below.
Network Timeouts
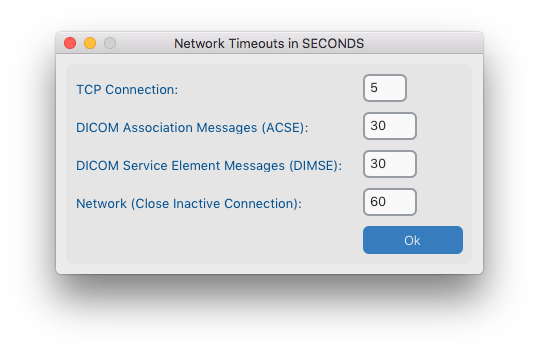
- The network timeouts are the maximum time the Anonymizer will wait for a response from a remote DICOM server before timing out.
- There are 4 different timeouts that are set in seconds and can be adjusted to suit the network conditions.
- The defaults are set to sensible values which should accommodate most servers.
- The Network Timeout will timeout if no expected activity has been detected from the remote server.
- The Network Timeout is the most likely timeout which may require tuning.
Storage Directory
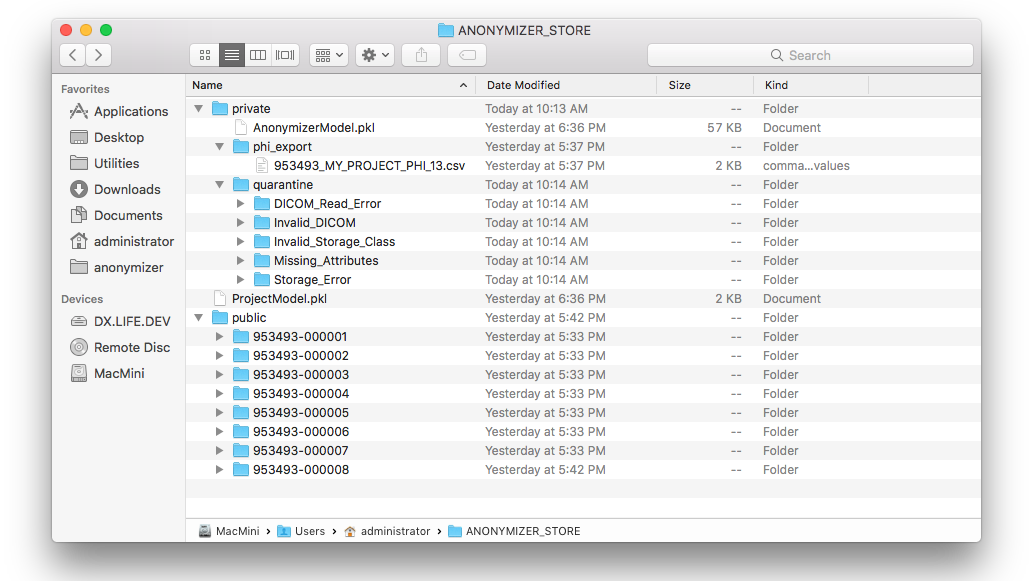
- The storage directory is a local file system location where the Anonymizer stores the anonymized files and all project data.
- By default the storage directory is created off the user home directory: /Documents/RSNA Anonymizer/ProjectName (see above)
- The project data file: ProjectModel.pkl stores the project settings is stored in the root of the storage directory.
- Two sub-directories are created off the storage directory root: /private and /public.
- The /private sub-directory contains Private Health Information (PHI) extracted from incoming DICOM files.
- The anonymizer data file: /private/AnonymizerModel.pkl stores the PHI data in a compressed form.
- The various /private/quarantine sub-directories are created as the errors are detected in incoming files.
- The /private/phi_exportsub-directory stores all PHI patient lookup files created from the Export View by clicking Create Patient Lookup
- The /public sub-directory contains the anonymized files with structure: /public/[anonymized_patient_id]/[study_uid]/[series_uid]/[instance_uid].dcm
- The storage directory cannot be changed after project creation.
Modalities
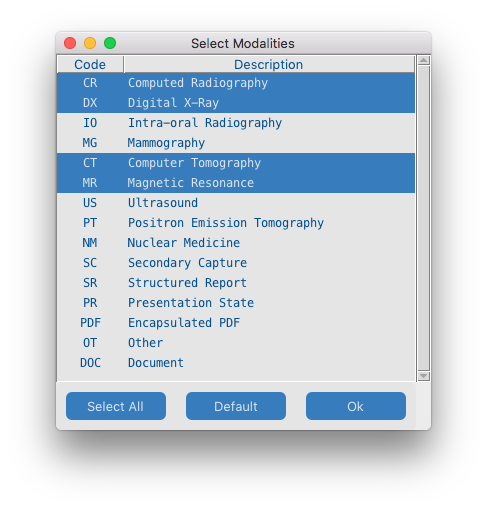
- The Modalities dialog lists the imaging modalities typically found in radiology.
- Click a line item to select/unselect a modality. A selected modality will be highlighted in green.
- The Anonymizer will only accept files with modalities matching those selected here.
- There is a one-to-many relationship between a modality and storage class.
- The Anonymizer will automatically create a list of allowed storage classes corresponding to the currently selected modalities.
- Storage classes can be edited by the Storage Classes dialog below.
Storage Classes
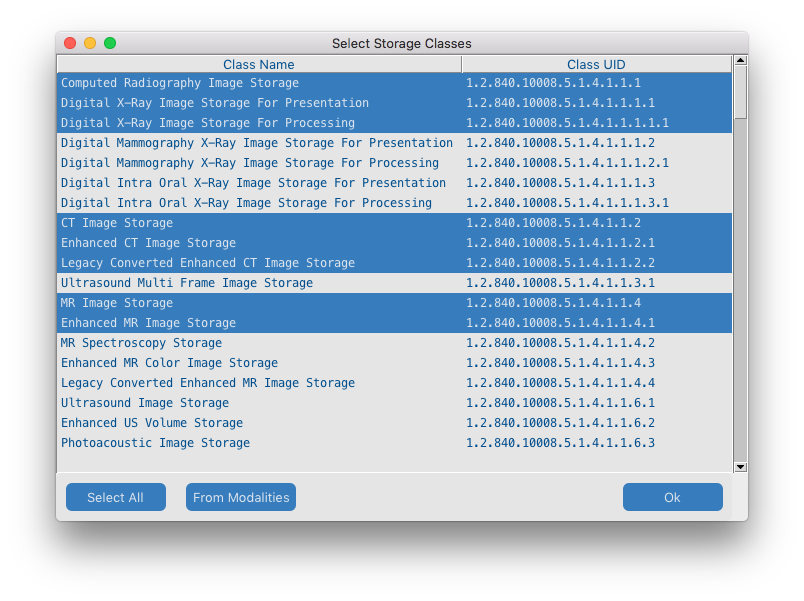
- The storage classes dialog lists all the current DICOM storage classes defined by the standard.
- The list of storage classes implied by the modality selection above can be confirmed and/or edited here.
- Click a line item to select/unselect a storage class. A selected storage class will be highlighted in green.
- After any edits, clicking the From Modalities button will reset to a list of storage classes implied by the currently selected modalities.
Transfer Syntaxes
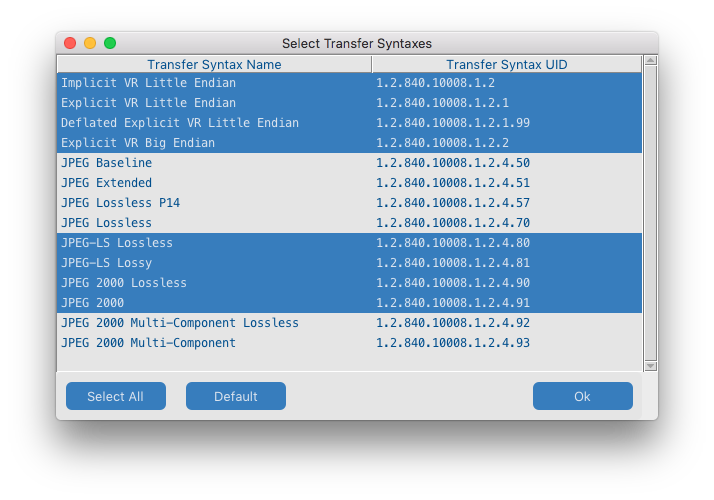
- The Transfer Syntaxes dialog lists the data formats currently supported by the Anonymizer.
- The first 4 transfer syntaxes do not use image compression and are selected by default.
- The other transfer syntaxes provide support for JPEG image compression with different algorithms.
- The selected storage classes combined with the selected transfer syntaxes determine which DICOM files are accepted by the Anonymizer.
- The presentation and storage contexts, determined by the selected storage classes and transfer syntaxes are used in association negotiation when the Anonymizer acts as SCU and SCP.
- The Anonymizer does not transcode DICOM files from one transfer syntax to another.
- The transfer syntax of DICOM files received by the Anonymizer is preserved in the corresponding anonymized file.
Script File
- The default script file which comes with this Anonymizer contains the instructions to meet the DICOM Standard de-identification protocol described in the corresponding help menu.
- Alternative script files can be loaded using this button to support more complex or legacy projects.
- If a different anonymizer script file is loaded be aware of the limitations as described in the overview section: differences from the Java Version.
Logging Levels
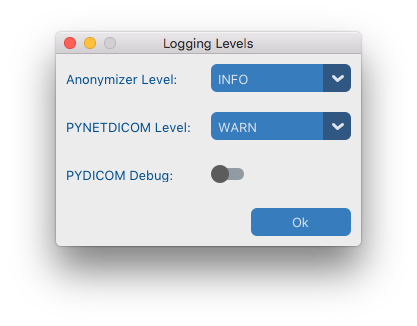
- The Anonymizer generates detailed logging information, capturing program activity at Debug, Info, Warning, Error and Critical levels, and stores it to file.
- There are up to 10 log files (max size: 100MB) in a rotating list.
- By default the storage directory is created off the user home directory: /Documents/RSNA Anonymizer/logs
- The log output of both DICOM libraries PYDICOM and PYNETDICOM used by the Anonymizer can be controlled using this dialog.
- Warning: when debug output is enabled for PYDICOM, PHI data will be written to the logs.
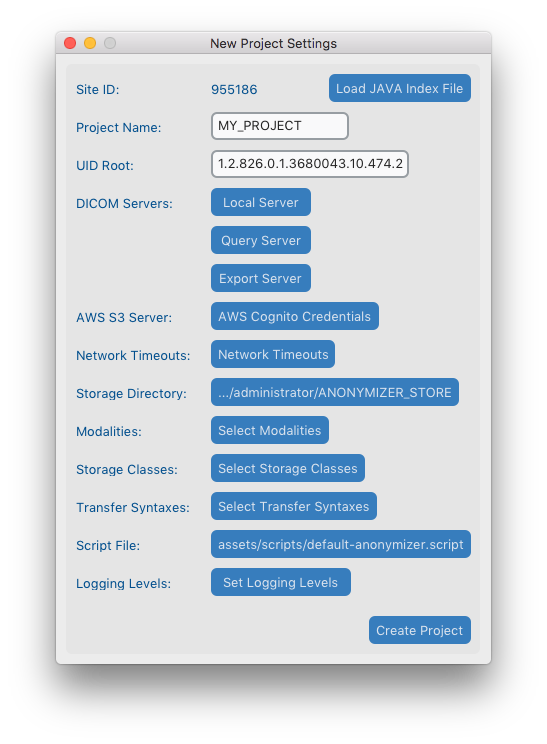
- Open Log Viewer is an excellent free multi-platform for viewing log files for more advanced users.
